WireGuard
- Each Ultra.cc service comes with a total of five different peer configurations that you can use to connect to your WireGuard service.
- This means that at one time, you can have a total of 5 different devices connected to your WireGuard service.
Install WireGuard on your Ultra.cc Service
Setup WireGuard on your Device
Windows
- Login to your Ultra Control Panel.
- Go to the
Apps Tab -> WireGuard and click on Show info.
- Click on
View Config (#) for one of the configurations and save it on your PC by clicking on the Download button.
- Download WireGuard for Windows here and install it.
- Launch WireGuard and click on
Import tunnel(s) from file.
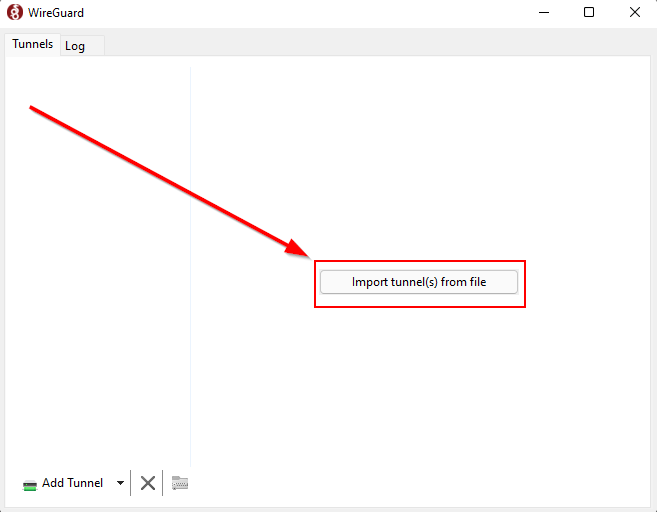
- Choose the
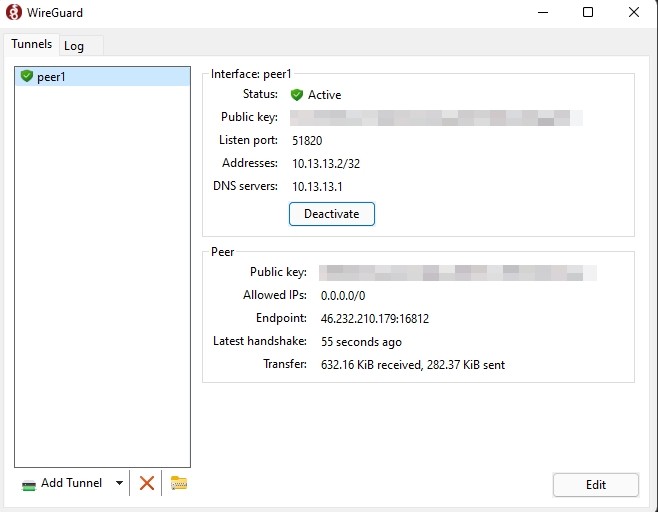
wireguard-config-peer#.zip file that you downloaded. In the example given below, we are using peer1.
- Click on
Activate.
MacOS
- Login to your Ultra Control Panel.
- Go to the
Apps Tab -> WireGuard and click on Show info.
- Click on
View Config (#) for one of the configurations and save it on your Mac by clicking on the Download button.
- Launch the
App Store and seach forWireGuard.
- Click on
Get and then Install.
- Launch
WireGuard using SpotLight Search or by using the Open button in the App Store.
- Click on
Import tunnel(s) from file.
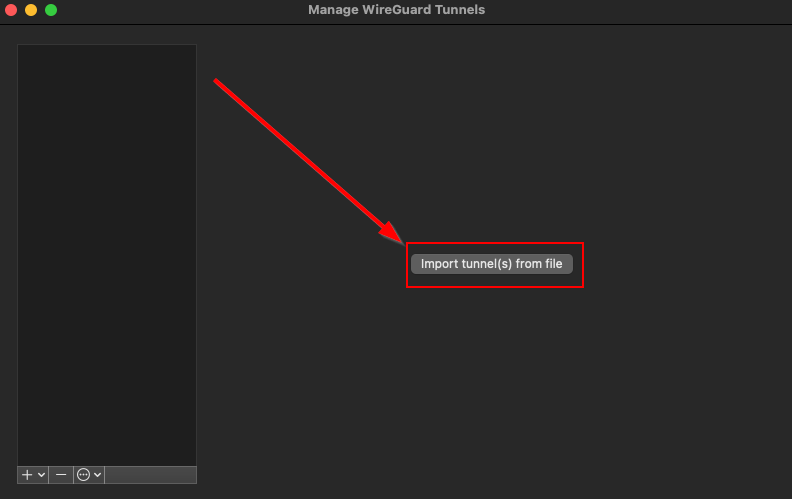
- Choose the
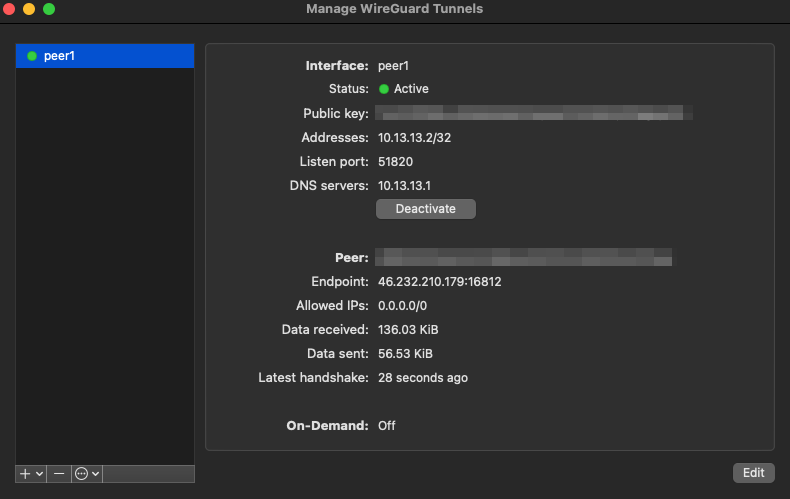
wireguard-config-peer#.zip file that you downloaded. In the example given below, we are using peer1.
- Click on
Activate.
Linux (Ubuntu)
- Specific install instructions for
Ubuntu 20.04 LTS have been described below. They may differ slightly for other Linux Distros.
- You can view install instructions for other Linux distros over here.
- Login to your Ultra Control Panel.
- Go to the
Apps Tab -> WireGuard and click on Show info.
- Click on
View Config (#) for one of the configurations and save it on your PC by clicking on the Download button.
- Launch a
Terminal window to execute some commands.
- Install
WireGaurd,resolvconf & unzip:
sudo apt install wireguard resolvconf unzip
- Navigate to the directory that you downloaded your WireGuard configuration to and extract the
*.conf file from it. Let us assume that the download was made to ~/Downloads and that Config (1) was downloaded:
cd ~/Downloads/
unzip wireguard-config-peer1.zip *.conf

Note: The wireguard-config-peer# will change depending on the configuration that you have downloaded.
sudo mv peer1.conf /etc/wireguard/

Note: The peer# will change depending on the configuration that you have downloaded.
- Reload systemd daemon and then start the WireGuard service:
sudo systemctl daemon-reload
sudo systemctl start wg-quick@peer1

Note: The peer# will change depending on the configuration that you have downloaded.
- Check the status of WireGuard, it should look similar to the screenshot given below:
sudo wg

- Check your IP address from What is my IP address to confrim that the VPN connection is working.
- Stop the WireGuard service:
sudo systemctl stop wg-quick@peer1

Note: The peer# will change depending on the configuration that you have downloaded.
Mobile Clients
Android
- Login to your Ultra Control Panel.
- Go to the
Apps Tab -> WireGuard and click on Show info.
- Click on
View Config (#) for one of the configurations. It will display a QR code.
- Install the WireGuard application from the Google Play Store.
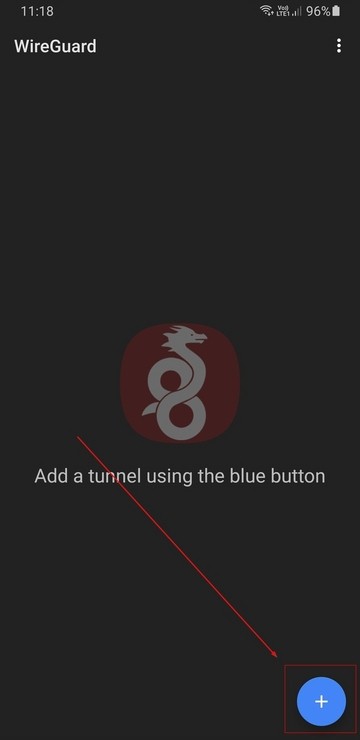
- Launch it and click on the
+ button.
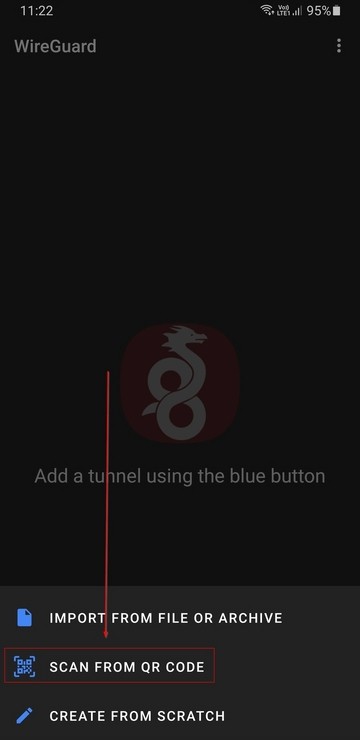
- Select
SCAN FROM QR CODE.
- Scan the QR code of the WireGuard configuration on your screen.
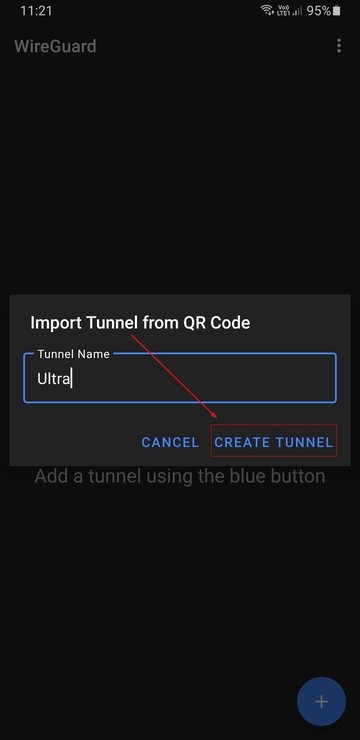
- Name the tunnel as per your preference and select
CREATE TUNNEL.
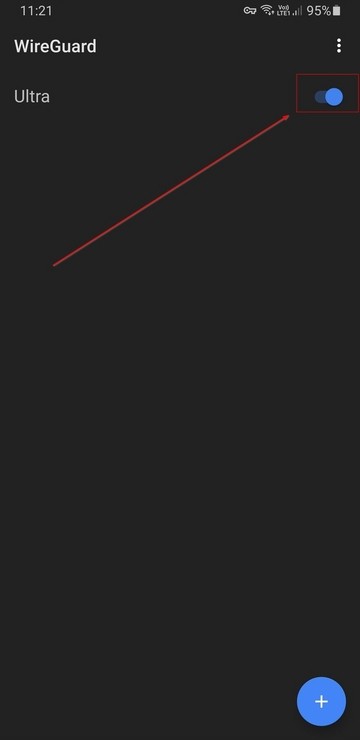
- Finally, enable the tunnel.
iOS
- Login to your Ultra Control Panel.
- Go to the
Apps Tab -> WireGuard and click on Show info.
- Click on
View Config (#) for one of the configurations. It will display a QR code.
- Install the WireGuard application from the App Store.
- Launch it and click on the
+ button.
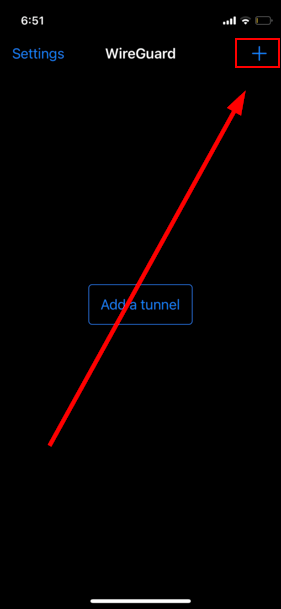
- Select
Create from QR code.

- Scan the QR code of the WireGuard configuration on your screen.
- Name the tunnel as per your preference and click on
Save.
.png)
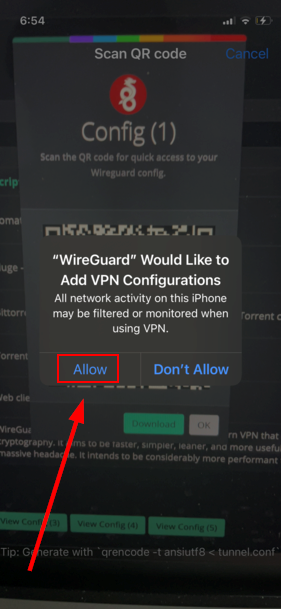
- Accept the permissions prompt by clicking on
Allow.
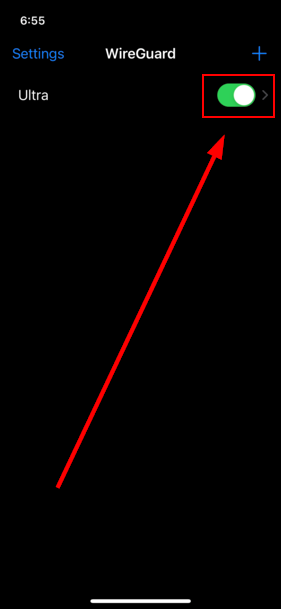
- Finally, enable the tunnel.


.png)

