Installation, Configuration & Usage of rclone
Ultra.cc support is unable to provide support for rclone, this is due to the large volume of variables and different configurations possible with rclone. The guides found here on the knowledge-base should be able to guide you through using rclone, and any further questions can easily be answered with a quick Google search. You may also be able to find community support for rclone through our community Discord server or the Rclone forums.
Please make yourself aware of the Ultra.cc Fair Usage Policy. It is very important not to mount your Cloud storage to any of the premade folders, this creates massive instability for both you and everyone else on your server. Always follow the documentation and create a new folder for mounting. It is your responsibility to ensure usage is within acceptable limits. Ignorance is not an excuse.
Please do not mount to any of the default directories such as:
files
media
bin
.apps
.config
www
/homexx/username/
or any pre-created directory found on your Ultra.cc Slot
In this guide, we will be going over the installation of rclone. We'll also cover the basic usages such as setting up a remote and how to copy files between your slot and a remote file host.
Installation
To begin, make sure you know how to SSH into your slot. All rclone commands are performed via SSH. You can find a guide on SSH here.
To install rclone, run the command below; this command will automatically install rclone to your slot for you.
rclone stable
curl https://raw.githubusercontent.com/ultraseedbox/UltraSeedbox-Scripts/master/MergerFS-Rclone/Installer%20Scripts/rclone-install-stable.sh | bash
rclone beta
curl https://raw.githubusercontent.com/ultraseedbox/UltraSeedbox-Scripts/master/MergerFS-Rclone/Installer%20Scripts/rclone-install-beta.sh | bash
Configuration
OAuth (Google Drive)
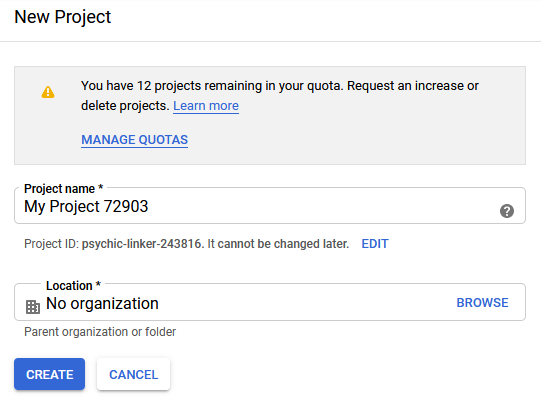
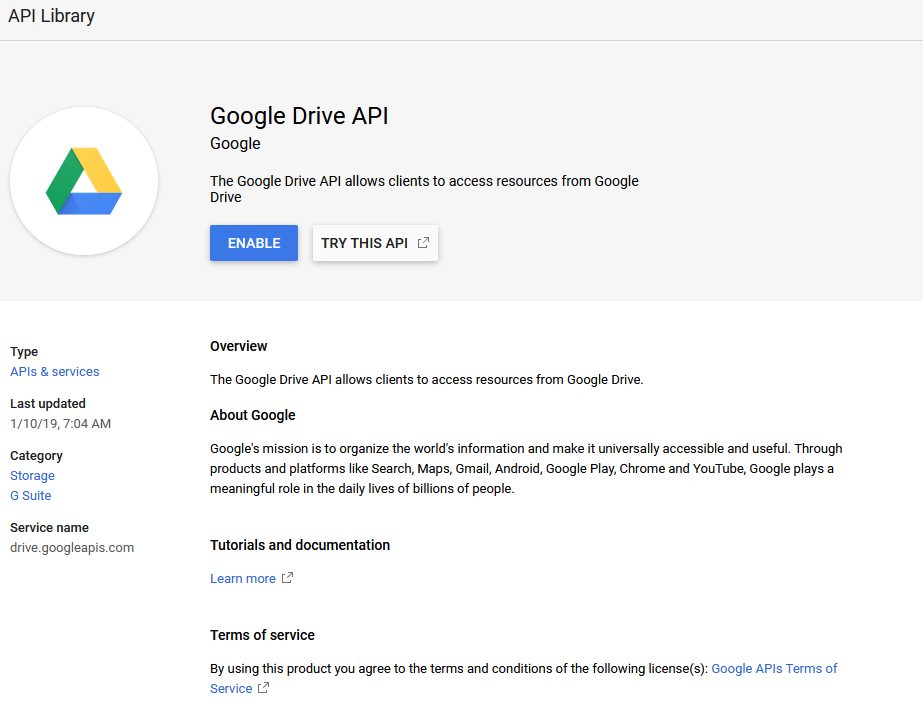
- Click Enable APIs and Services, search for Drive and select Google Drive.
- Click Enable on the window that pops up.
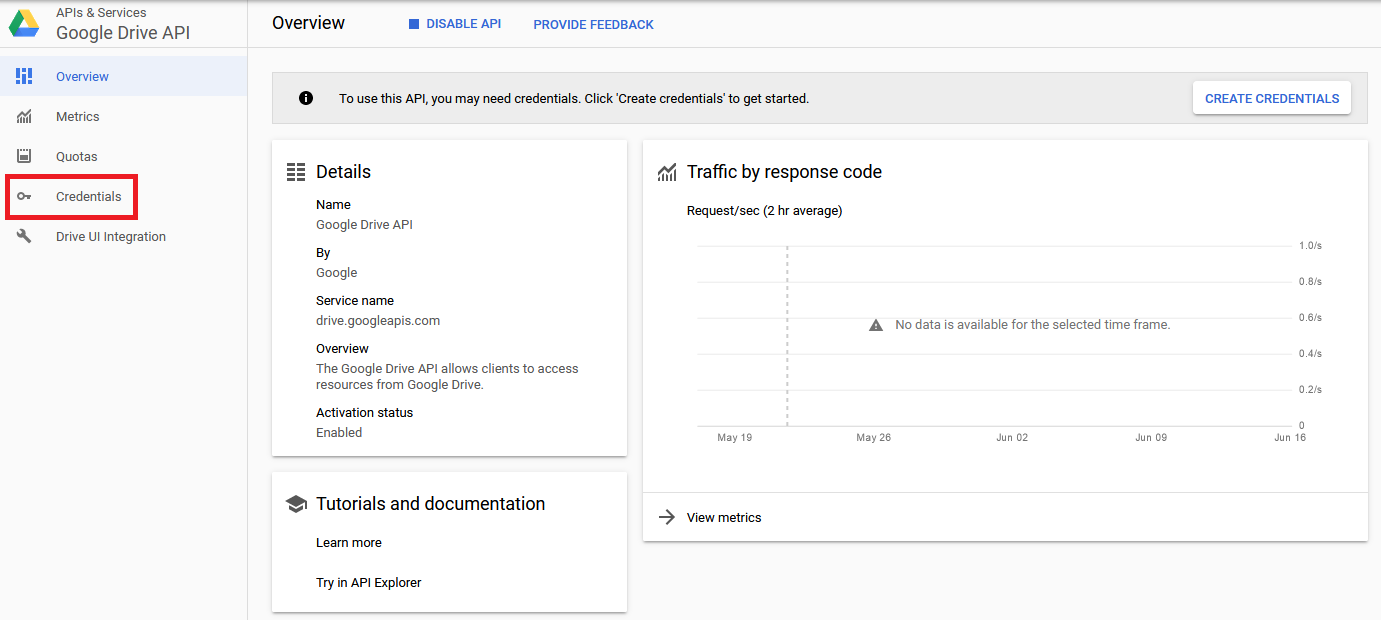
- Click Credentials on the left side of the screen, then click Credentials in APIs & Services.
- Click Create credentials, and select OAuth client ID.
- You may be prompted to configure a consent screen. Click to do this, enter a name, and then click Save.
- On the next screen, select Desktop App and then select Create. The default name is OK, and you do not need to change it.
- After you click Create, the window to the right will pop up. These are our keys to use in rclone configuration. Copy these or leave the window open for when you need them.
rclone
Now we need to configure a remote to use with rclone. For this guide, we will be configuring Google Drive. This is the most common remote people tend to use as it offers ample storage capacities for a reasonable price. Should you wish to use a different cloud host, feel free to modify the steps, you take.
- Run the command
rclone config
kbguides@lw914:~$ rclone config
2019/06/15 18:16:33 NOTICE: Config file "/home27/kbguides/.config/rclone/rclone.conf" not found - using defaults
No remotes found - make a new one
n) New remote
s) Set configuration password
q) Quit config
n/s/q>
- Press
nand then Enter. Type the name you wish to use for your remote and then press Enter once more. Here, we'll usegdriveas our remote name. - Scroll through the list of supported remotes and pick the one you wish. For this example, we will be using Google Drive, so we will type
12then press Enter.
Type of storage to configure.
Enter a string value—Press Enter for the default ("").
Choose a number from below, or type in your own value
...
14 / Google Cloud Storage (this is not Google Drive)
   \ "google cloud storage"
15 / Google Drive
   \ "drive"
16 / Hubic
   \ "hubic"
...
- You will be prompted to enter your
client_id. If you have not generated your keys yet or do not know what it is, I recommend using this guide to help you generate them Configuring Oauth for Google Drive. - Once you have followed the steps in the guide, copy your client ID and paste it into the terminal, next press Enter. Now copy your client secret, paste it in, and again press Enter.
Google Application Client Id
Setting your own is recommended.
See https://rclone.org/drive/#making-your-own-client-id for how to create your own.
If you leave this blank, it will use an internal key which is low performance.
Enter a string value. Press Enter for the default ("").
client_id> example12345

Enter a string value. Press Enter for the default ("").
client_secret> example12345
- Choose the scope you wish to give to rclone. Full Access is safe and is likely the most useful one to you, so in this case we will type
1then press Enter.
Scope that rclone should use when requesting Access from Drive.
Enter a string value. Press Enter for the default ("").
Choose a number from below, or type in your own value
 1 / Full access to all files, excluding Application Data Folder.
   \ "drive"
 2 / Read-only access to file metadata and file contents.
   \ "Drive.readonly"
   / Access to files created by rclone only.
 3 | These are visible on the drive website.
   | File authorization is revoked when the user deauthorizes the app.
   \ "Drive.file"
   / Allows read and write Access to the Application Data folder.
 4 | This is not visible in the drive website.
   \ "Drive.appfolder"
   / Allows read-only Access to file metadata but
 5 | does not allow any access to read or download file content.
   \ "drive.metadata.readonly"
scope> 1
- Unless you know what you are doing, leave the
root folderblank and press Enter. Leave Service Account Credentials JSON file path blank also, again press Enter. Then typento choose to not edit advanced config and press Enter.
The ID of the root folder
Leave blank normally.
Fill in to access "Computers" folders. (see docs).
Enter a string value. Press Enter for the default ("").
root_folder_id>

Service Account Credentials JSON file path
Leave blank normally.
Needed only if you want use SA instead of interactive login.
Enter a string value. Press **Enter** for the default ("").
service_account_file>

Edit advanced config? (y/n)
y) Yes
n) No
y/n> n
- Type
nto choose to not use auto-config and press Enter. You will be provided with a URL, copy this URL and paste it into your web browser. - Choose the Google Drive account you wish to use and click Allow, giving rclone permission to use it.
- You will be given a code, copy this and place it into your terminal, then press Enter.
- Finally, type
nto choose to not configure as a team drive and press Enter.
Use auto config?
 * Say Y if not sure
 * Say N if you are working on a remote or headless machine
y) Yes
n) No
y/n> n

If your browser doesn't open automatically, go to the following link: <URL WILL BE HERE>
Log in and authorize rclone for Access
Enter verification code> random string

Configure this as a team drive?
y) Yes
n) No
y/n> n
- You will be shown a confirmation screen. If all is OK, type `y' and then press Enter to save your configuration.
- If you notice any issues, you can edit them from here by typing
e, or delete them usingd'. Finally, pressq` and then Enter to quit the rclone config wizard.
--------------------
[gdrive]
type = drive
client_id = blank
client_secret = blank
scope = drive
token = {"access_token":"blank"}
--------------------
y) Yes this is OK
e) Edit this remote
d) Delete this remote
y/e/d>
Usage
rclone is interacted with purely through SSH. Please ensure you are familiar with the Linux terminal and using SSH prior to using rclone.
General Commands
These commands are helpful to remember. They allow you to interact with rclone and move files around between your local and remote storage or even between two remote destinations.
config - Execute this command to add, modify or remove remote file hosts.
Usage: rclone config

copy - Used to copy files between two locations, remote -> remote, remote -> local, local -> remote
Usage: rclone copy [-P] {origin} {destination}

move - Same as copy however, it does not leave the files at the source
Usage: rclone move [-P] {origin} {destination}

sync - Will make the destination directory identical to the origin. If files exist on the destination that does not exist on origin, they will be deleted. Be careful with the sync command, as it can cause data loss.
Usage: rclone sync [-P] {origin} {destination}

When dealing with remote filesystems, use:
{remote}:{path}

For example, if you wished to copy a file named movie.mkv from your current working directory to a path named Movies in a remote name Drive you'd use this command:
rclone copy movie.mkv Drive:Movies


