Homarr
Homarr is a browser-based dashboard that integrates a wide variety of applications. With Homarr, you can access and control everything in one convenient location.
For more information about this app, follow this link.
Initial Setup
- Log in to your Ultra service via SSH
- Once connected, initiate the installation of Homarr by executing the following command:
- Be sure to choose a strong password
app-homarr install -p '<your-password>'
- If the installation was successful, you should see the below output in your SSH terminal
{"data": {"url": "https://homarr-ultradocs.hostname.usbx.me", "username": "ultradocs", "password": "kmRWdeCZnifj39gC598MXng3Hj7GyQwt", "version": "0.15.2", "port": 12345}, "result": true}
- Take note of the URL in the above output, this is how you access the Homarr webUI.
Configuration
- After the installation, access the webUI of Homarr by copying the URL from the installation procedure, and paste it into your browser.
- You will be presented with a login form, log in with your Ultra service username and the password that you previously set during the installation.
- Once you have successfully logged in, you will see your Homarr dashboard.
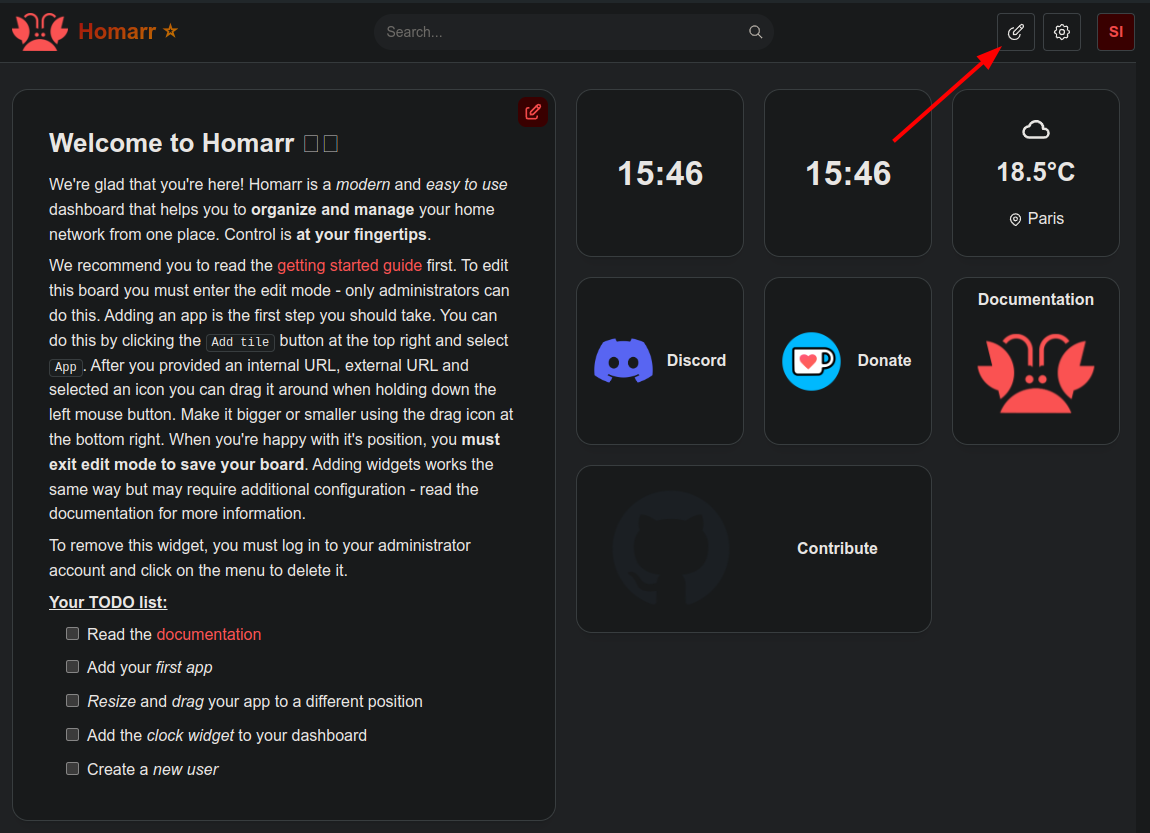
- To add an application, click the Enter Edit Mode button in the top right corner.
- While in edit mode, you can move the existing tiles by dragging them across the screen, or you can edit them by pressing the cog icon in the top right corner of the specific tile.
- Next, to add an application, click the Add Tile icon in the top right corner.

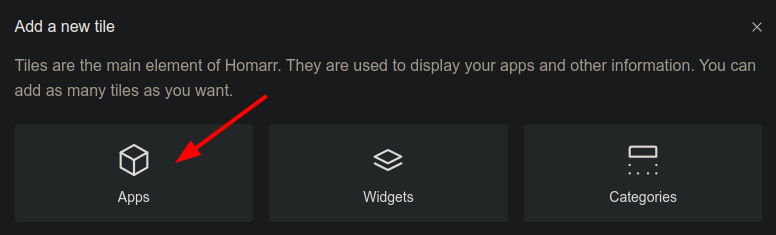
- A window will appear, where you can select what kind of tile you want to add. In this guide.
- To add an application integration tile, click the Apps button.
- After clicking the Apps button in the previous step, you will be presented with a new window where you need to enter the connection details for the application you want to add. We will use qBittorrent as an example, but the procedure is more or less the same for any other application.
- The General and Integration tabs are the bare minimum that needs to be configured, the rest of the tabs are optional.
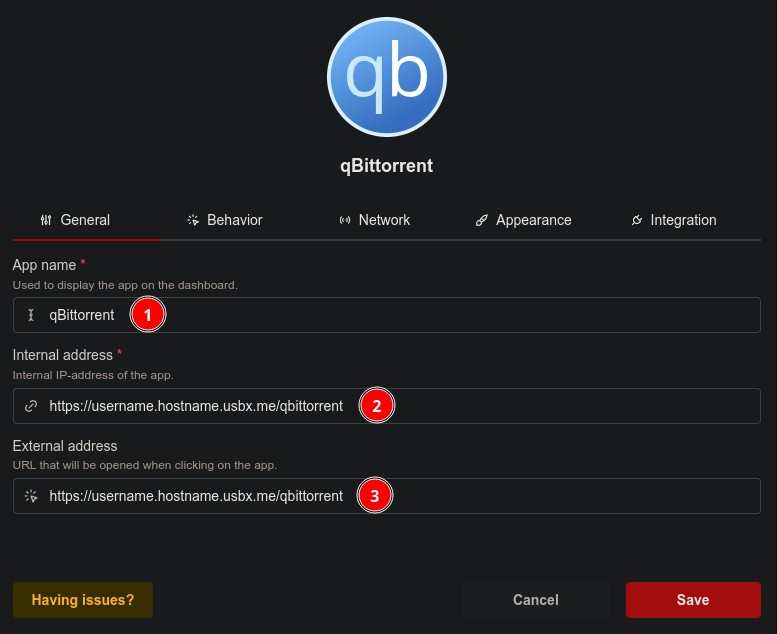
- Let's begin with the General tab, enter the following:
-
 App name: Name your application
 -
 Internal address:
 https://username.hostname.usbx.me/qbittorrent -
 External address:
 https://username.hostname.usbx.me/qbittorrent
-
- Be sure to replace
usernameandhostnamewith the specific details for your service. - Next, go to the Integration tab.
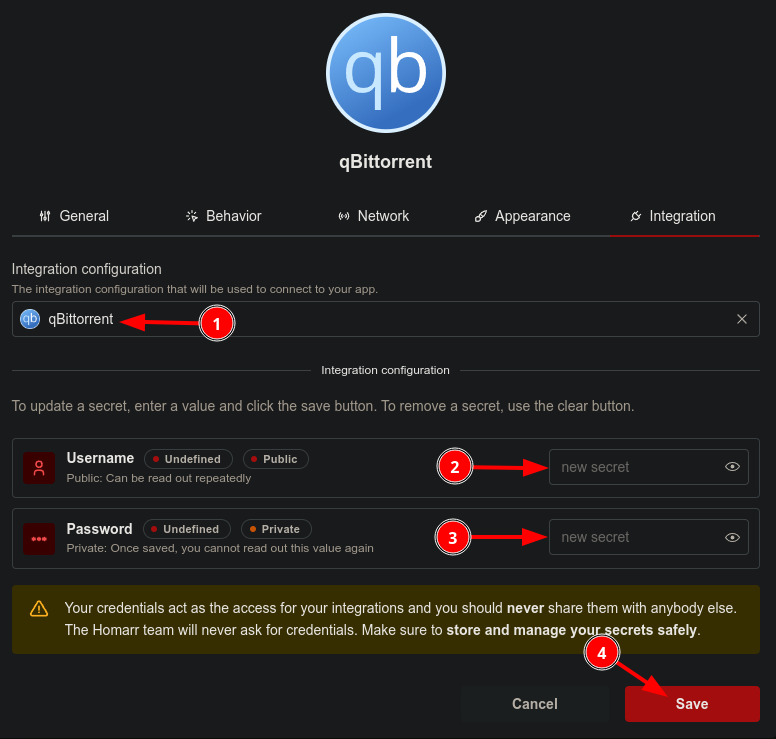
Some applications will require an API Key to authenticate instead of a username and password. For example, the *arr suite of applications will require an API Key, which most often can be found in Settings > General of the application you are integrating with Homarr.
- Under the Integration tab, begin by selecting qBittorrent from the Integration configuration drop-down menu.
- In the Username field, enter your Ultra service username.
- In the Password field, enter your qBittorrent password, which can be found on the UCP.
- Lastly, click the
 Save button.

- Do not forget to exit the tile edit mode by pressing the Exit and Save button in the top right corner of the Homarr dashboard.
- You should now see a qBittorrent tile added on your Homarr dashboard. To add more app integration tiles, simply repeat the above procedure.