MTR Guide
This is a guide for gathering useful information on issues with the download and upload speeds that your local machine gets to and from your Ultra.cc service.
You will require your local machine's public IP address to perform all the steps listed in this guide. Disable any VPN/Proxy on your system and then check your IP at myip.com.
The guide shows you the following:
- Perform an MTR test from your Ultra.cc server to your Local Machine.
- Install MTR to your local machine and use it.
- Understand the results of the MTR tests you performed.
MTR
MTR is a diagnostic tool which can be used to determine which routers transmit data packets onto the destination host and which routers may be experiencing problems.This information allows us to figure out where a network problem lies. It is recommended by us to run a trace in both directions when troubleshooting.
(Local Machine -> Ultra.cc Server) & (Ultra.cc Server -> Local Machine).
MTR is installed by default on all our Ultra.cc servers.
MTR Usage on your Ultra.cc Slot
- Login to your Ultra.cc slot via SSH. How to connect to your Ultra.cc slot via SSH
- Execute the following SSH command:
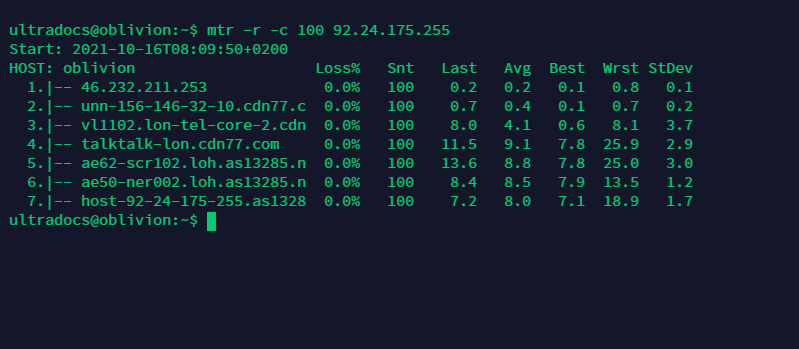
mtr -w -c 100 <Public IP address of your Local Machine>
Example:
Windows
MTR Installation
- Download WinMTR.
- Extract the compressed file using your favorite file archiver utiliy like WinRAR.
- Based on your system architecture; x32 or x64 navigate to the respective folder.
- Run WinMTR.exe
MTR Usage
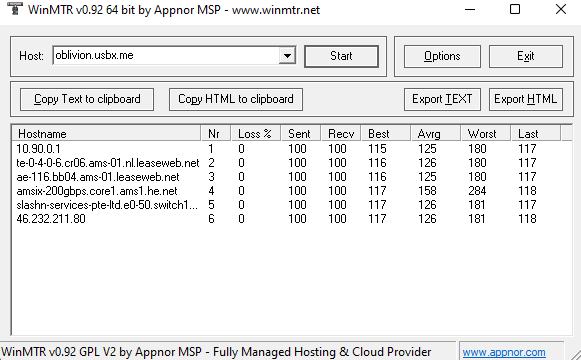
- Enter your slot's hostname i.e
servername.usbx.mein the Host field, then click onStart. - Wait for 100 packets to be sent, you can see this number under the
Sentcolumn. - Once 100 packets are sent click on
Stop. - In case results need to be shared with staff, the
Copy Text to clipboardoption will come in handy.
Example:
MacOS
MTR Installation
- Open a terminal window. You can do a spotlight search for it (Command + Space and then type Terminal).
- Install brew if you don't have it installed.
/bin/bash -c "$(curl -fsSL https://raw.githubusercontent.com/Homebrew/install/master/install.sh)"
- Install MTR using brew.
brew install mtr
- Check MTR version
ls /usr/local/Cellar/mtr/
- Change directory to MTR's install location.
cd /usr/local/Cellar/mtr/<version from Step 4>/sbin
Example:
cd /usr/local/Cellar/mtr/0.94/sbin
- Make MTR executable by your system.
cp -r mtr* /usr/local/bin/
In case the copy command fails due to permission error(s) run it again with sudo.
sudo cp -r mtr* /usr/local/bin/
MTR Usage
- Open a terminal window. You can do a spotlight search for it (Command + Space and then type Terminal).
- Execute the following command:
sudo mtr -w -c 100 servername.usbx.me
Example:
Linux
MTR Installation
MTR can be installed on the various Linux Distros using their particular package tools.
- Install MTR on Debian/Ubuntu using apt with the following command:
sudo apt update && sudo apt -y install mtr - Install MTR on CentOS/RHEL/Fedora using yum with the following command:
sudo yum update && sudo yum -y install mtr
MTR Usage
- Open a terminal window.
- Run the following command:
mtr -w -c 100 servername.usbx.me
Example:
mtr -w -c 100 oblivion.usbx.me
Understanding MTR Results
You should now have two MTR results. One performed from your Ultra.cc slot and one performed from your local device. The former describes the route that your Ultra.cc server is taking to transfer data to your local machine and the latter describes the route that your ISP takes to transfer data from your local device to your Ultra.cc server.
The Loss% at each hop is of importance. If it's 0% then there are no issues with routing and your speed problems lie elsewhere. On the other hand, if there is a lot of loss at multiple hops there is an issue with the route - it is congested.
Unfortunately, in the case that your upload speed isn't great and the route from your local device to your Ultra.cc server is congested, we cannot do much. Your ISP must be queried for this and they must provide better routing.


